|
| |
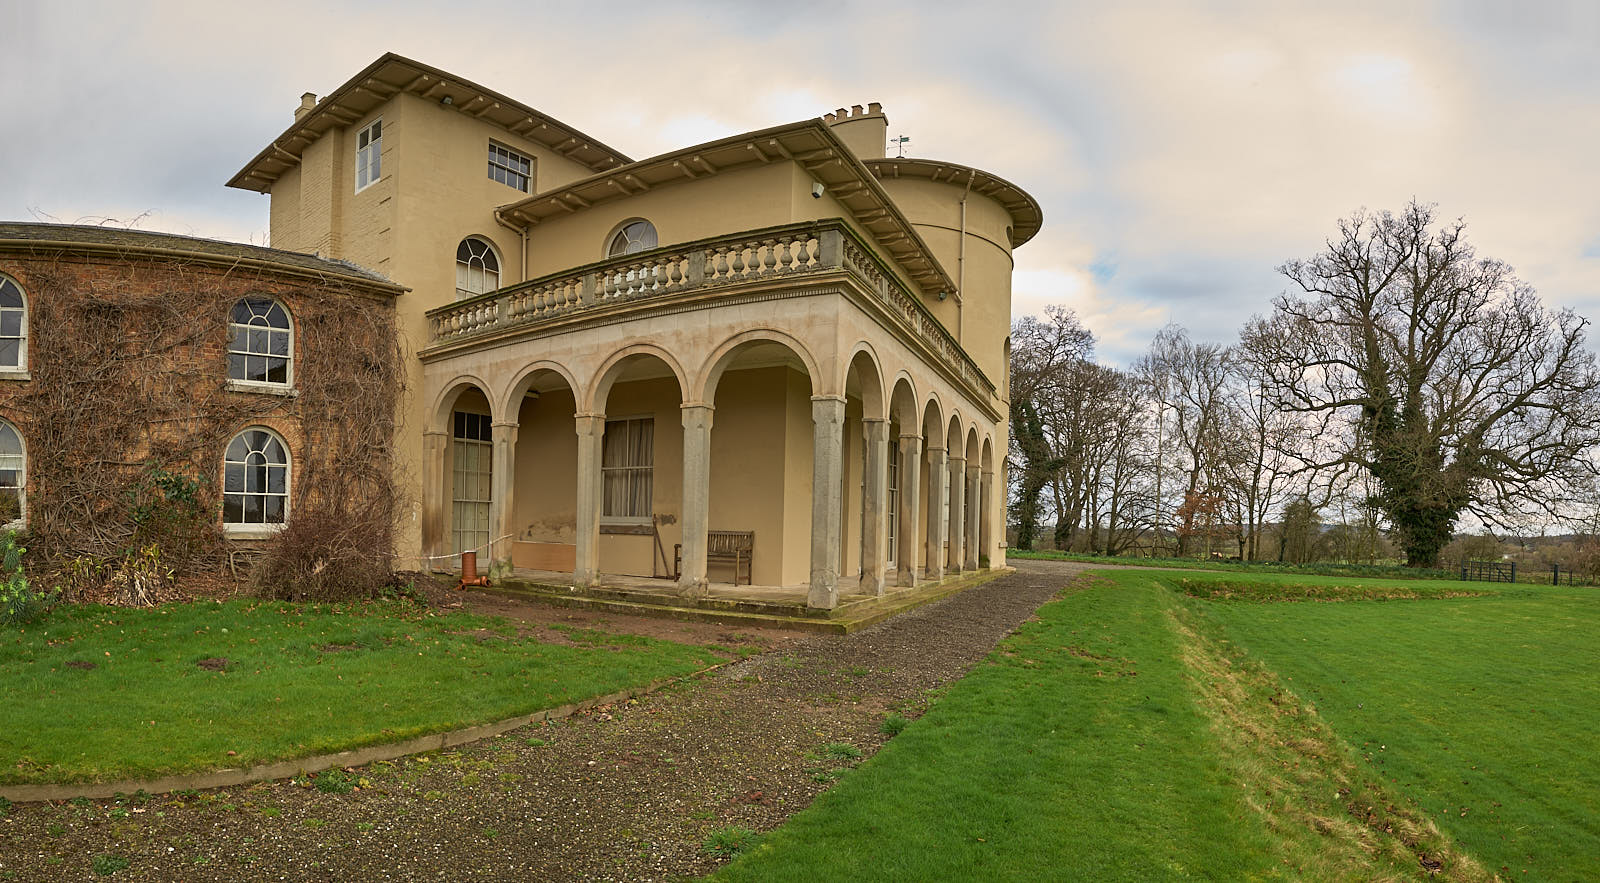
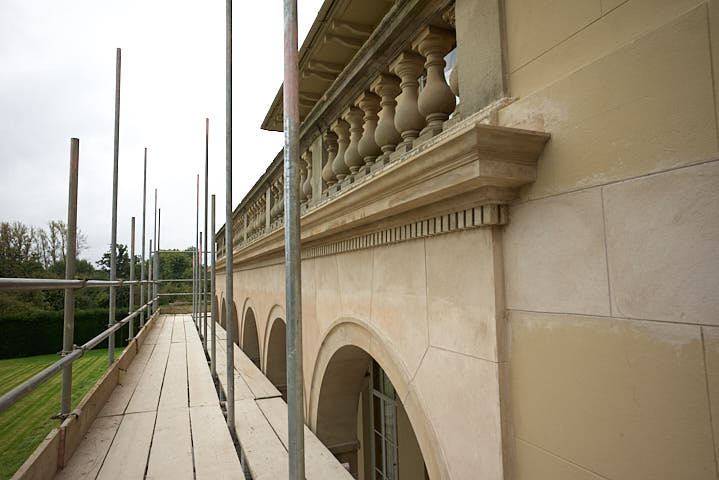
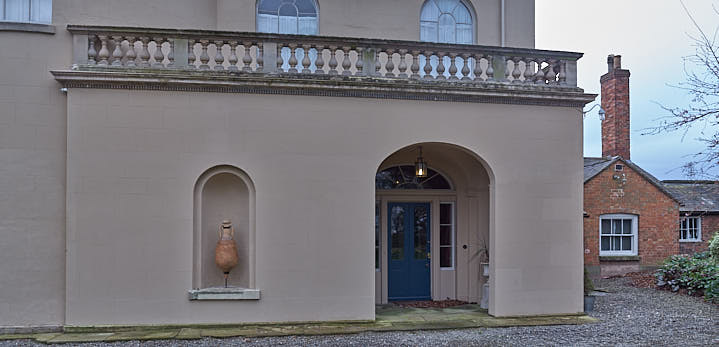
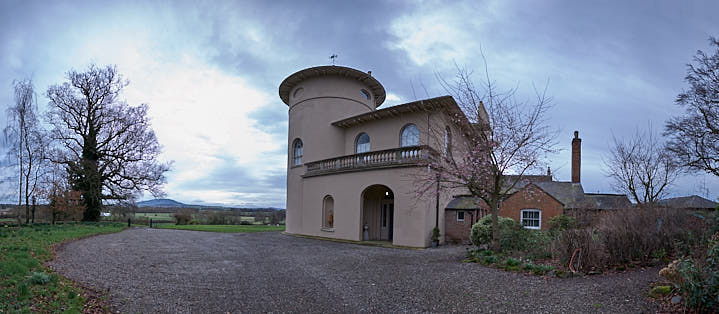
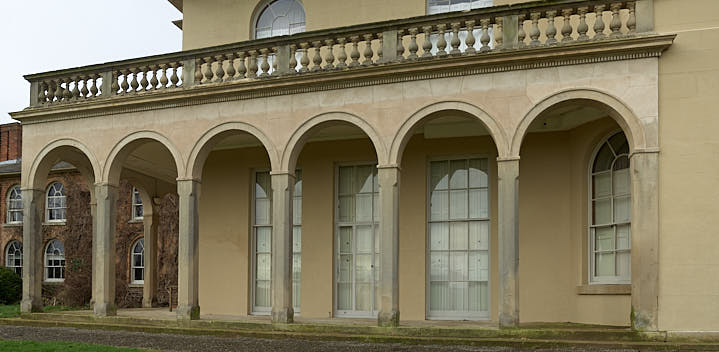
Cronkhill was designed by Architect John Nash in 1802
We had the pleasure of being responsible for replacing the defective Roman Cement work, both plain and decorative. This was a small part of a large restoration project undertaken by the National Trust. This also included repairs to the roof, rainwater goods, windows, pointing brickwork as well as painting. |
|
| |
 |
| |
|
|
|
The original render and plaster mouldings were made using Roman Cement. This type of cement is no longer manufactured, so an alternative was used which performs in a very similar way, so it is an ideal replacement.
This was an interesting job although difficult at times coping with the weather. From baking hot to freezing cold. Sheltering ourselves and our work from the worst of it. The contract for us lasted for just over a year.
As with all of our work peeling back the defective layers of plaster, so that we can get back to a suitable surface to work on, reveals a lot about the building, its original construction method and any alterations that have taken place. It is a glimpse in to the past, the tradesmen's method of work, for every day things and how they overcame some of the difficulties. With all this type of work conserving as much of the original as possible is the main concern, as well as the impact on any wildlife.
Our role in this contract was to make good the plasterwork that was deemed to be defective by the Architect and the Trust. This was mainly small areas with the largest area being approximately 43 metres squared. The removal of the render wherever possible was taken off to the ashlar lines. Drawings were produced of the patches showing all the locations of the ashlar lines so that the new ones can be put back in the exactly the same position.
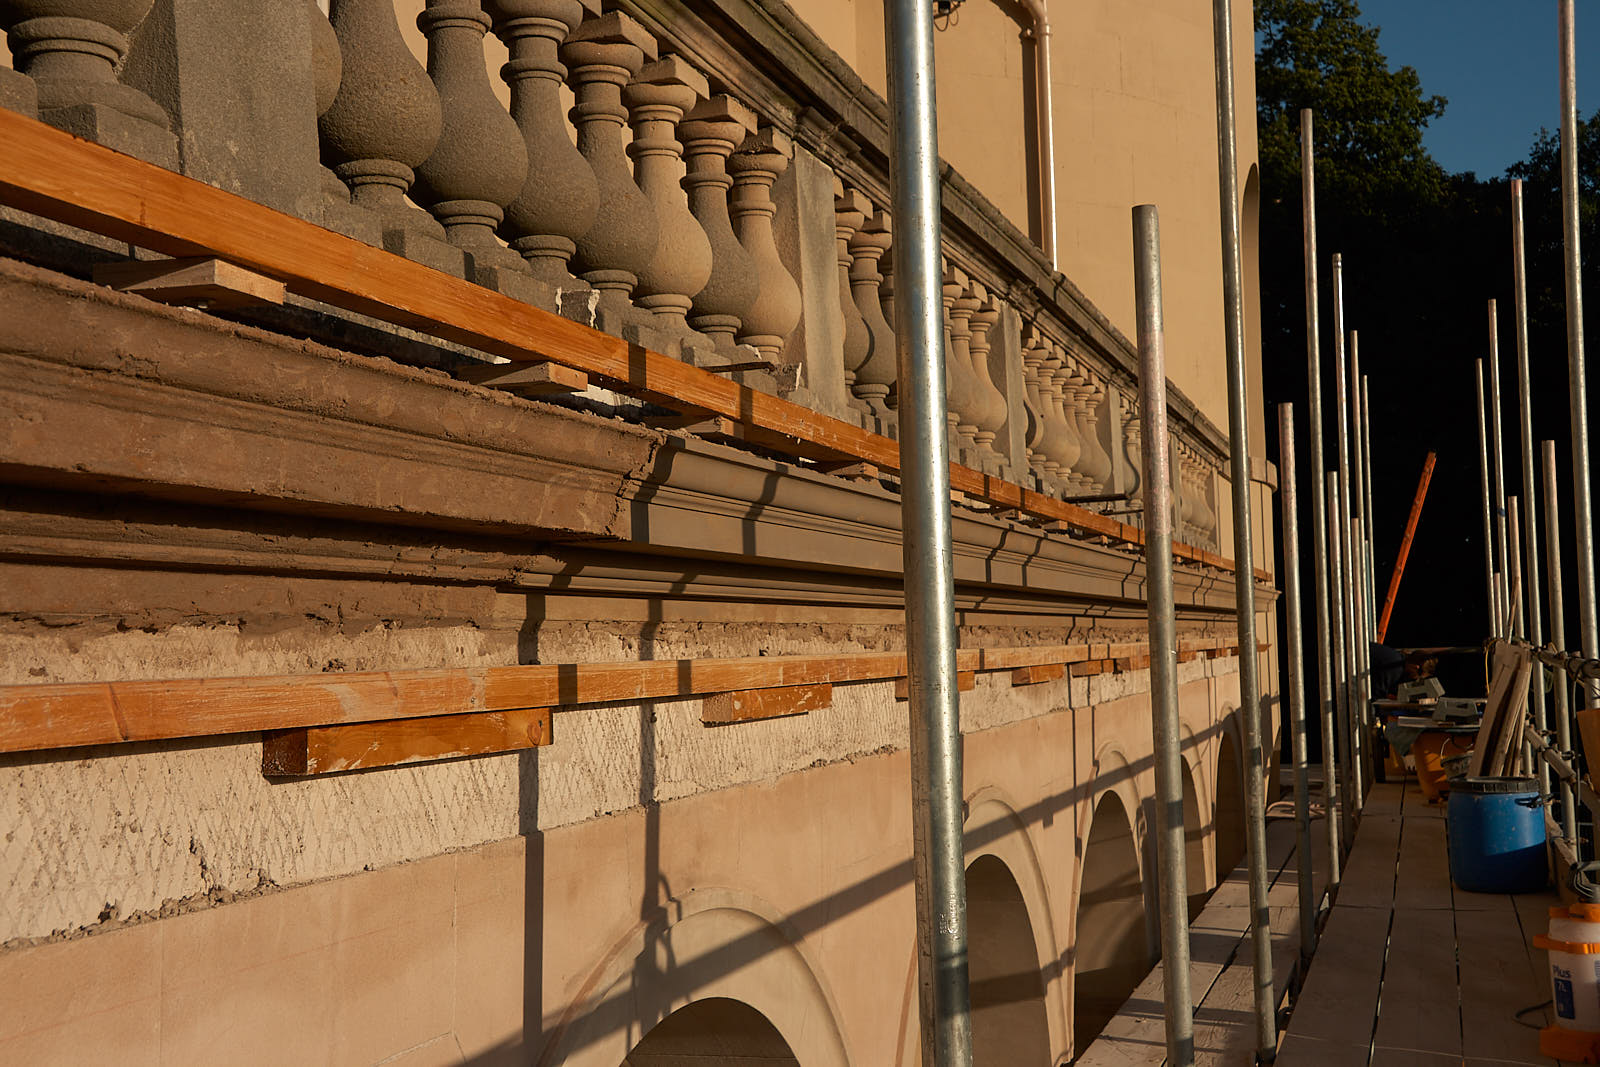
We were also asked to re-run the mouldings to the arches, reform the band running around the Tower just below the elliptical windows, lath and plaster to the soffit of the Tower, patch and make good the cornice below the balustrade by the front door and above the arches. |
|
| |
|
|
|
| |
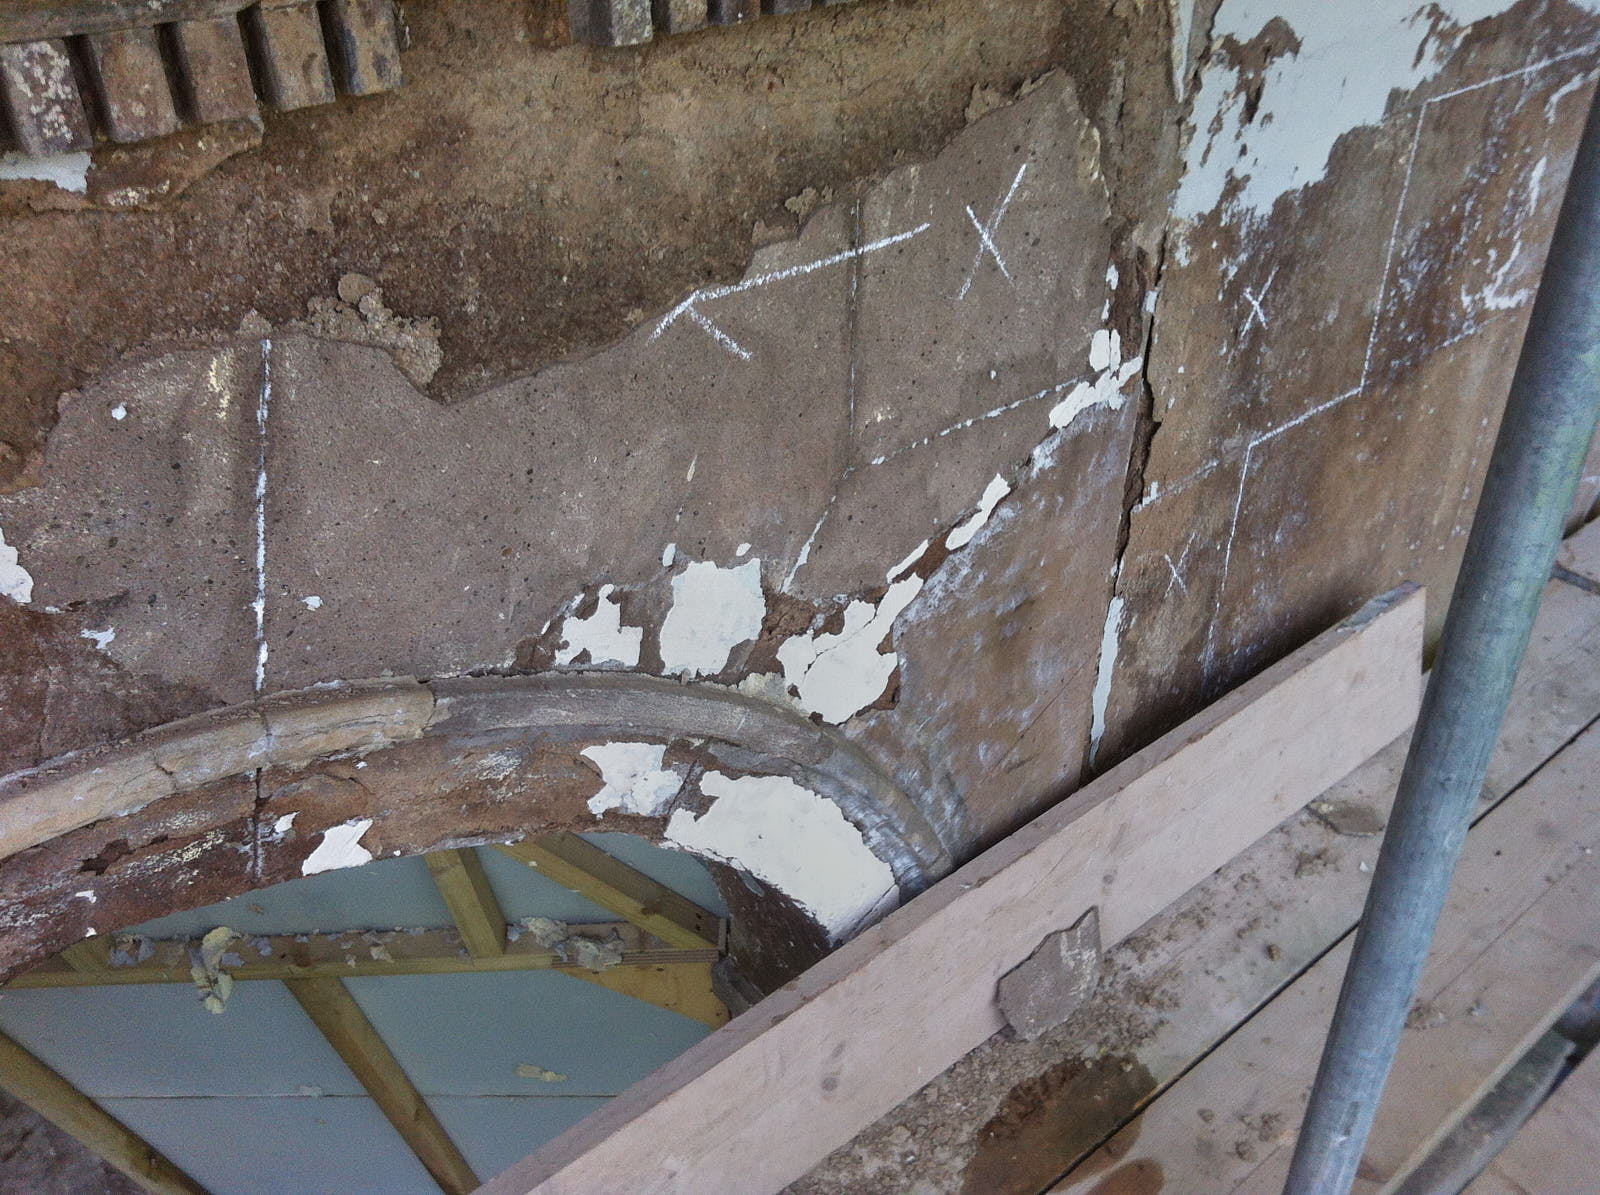
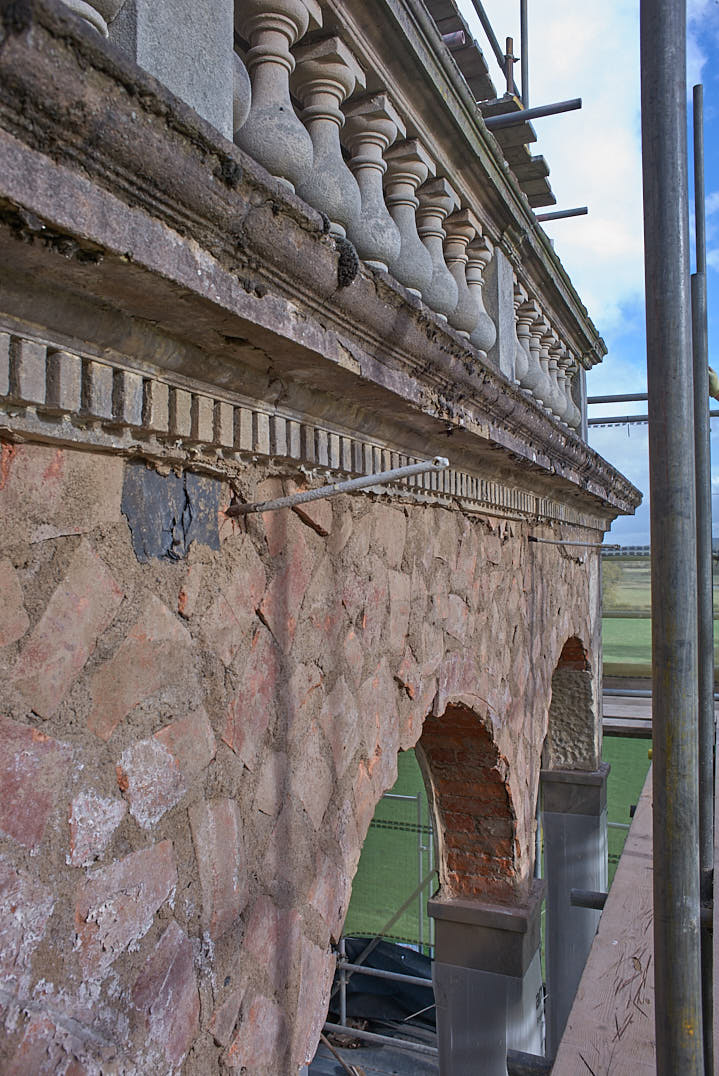
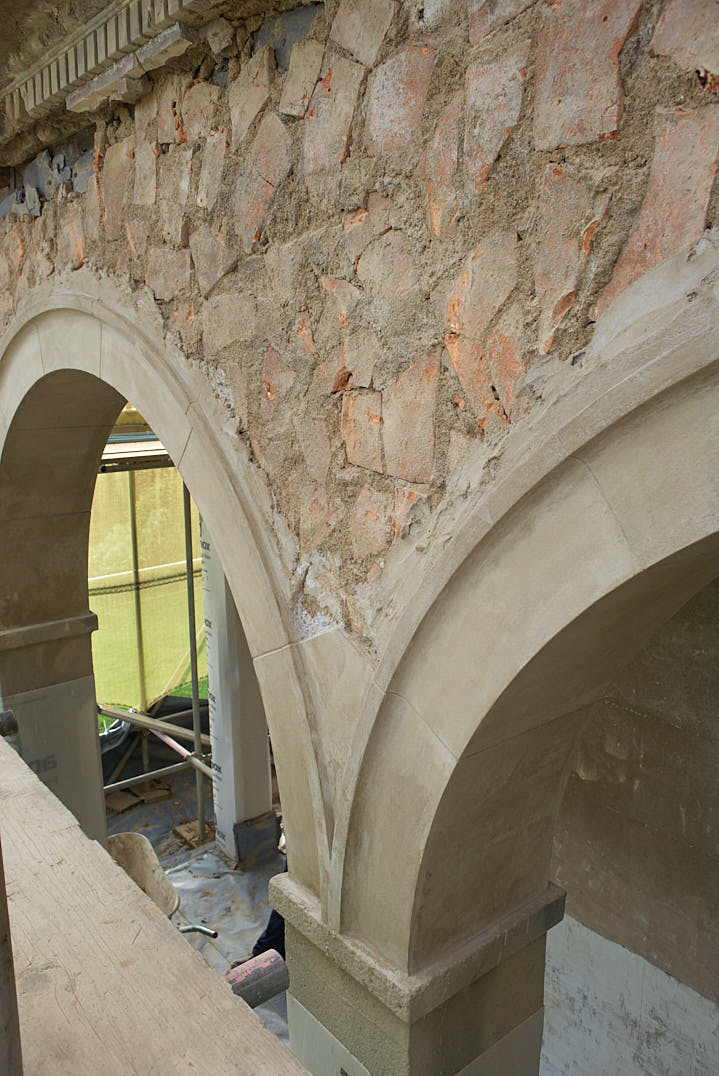
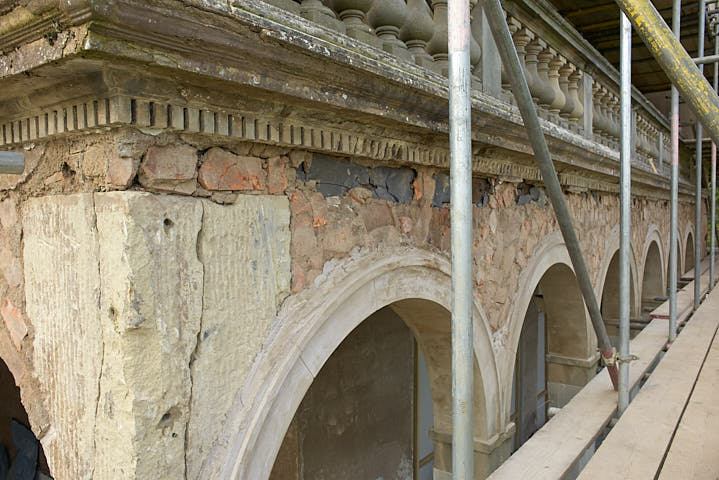
Pictures above show some of the original ashlar work and arch mouldings. These are a good representation of the general condition of the plasterwork to the arches. |
| |
|
|
|
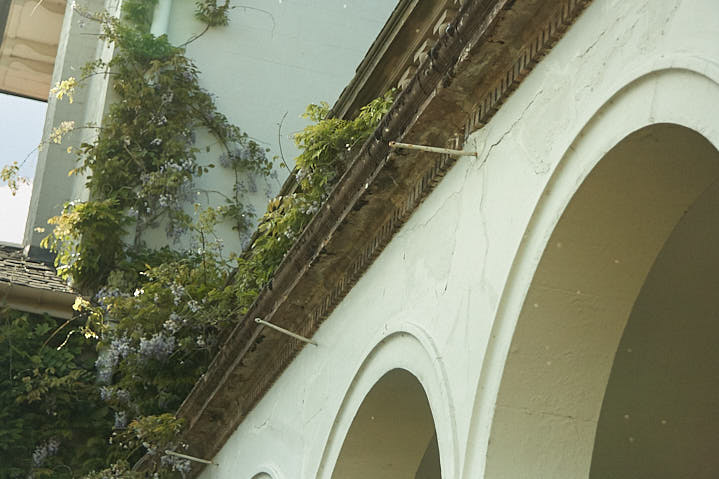
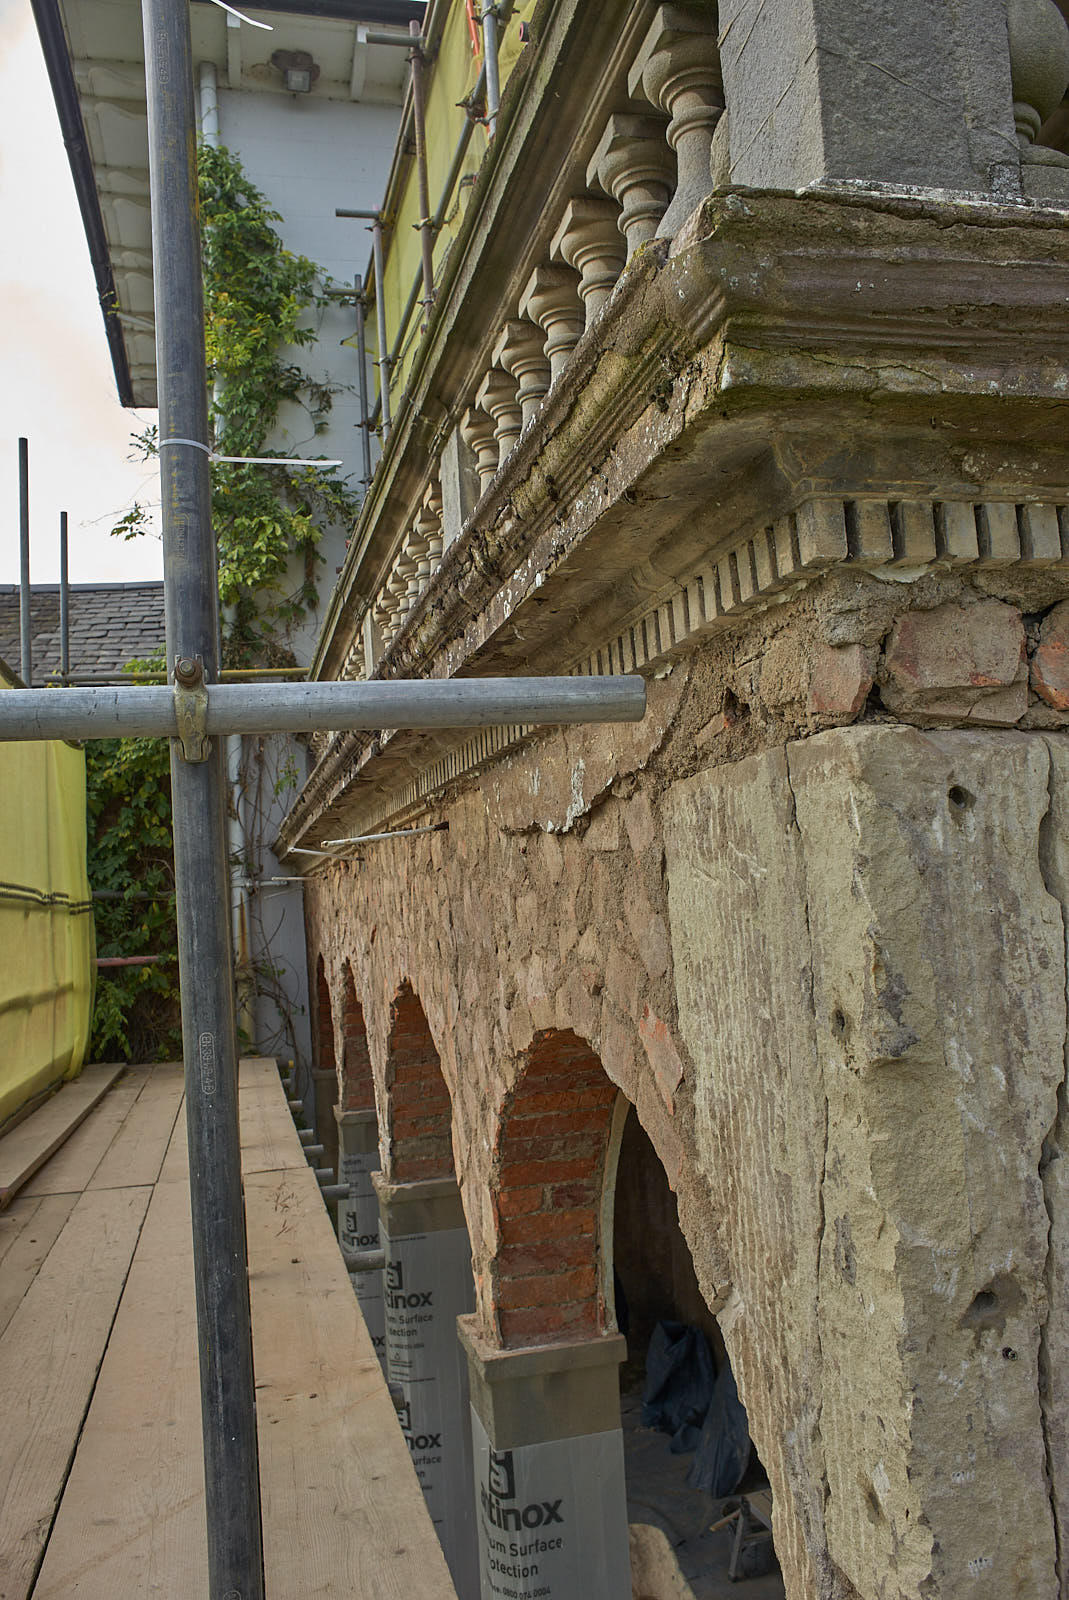
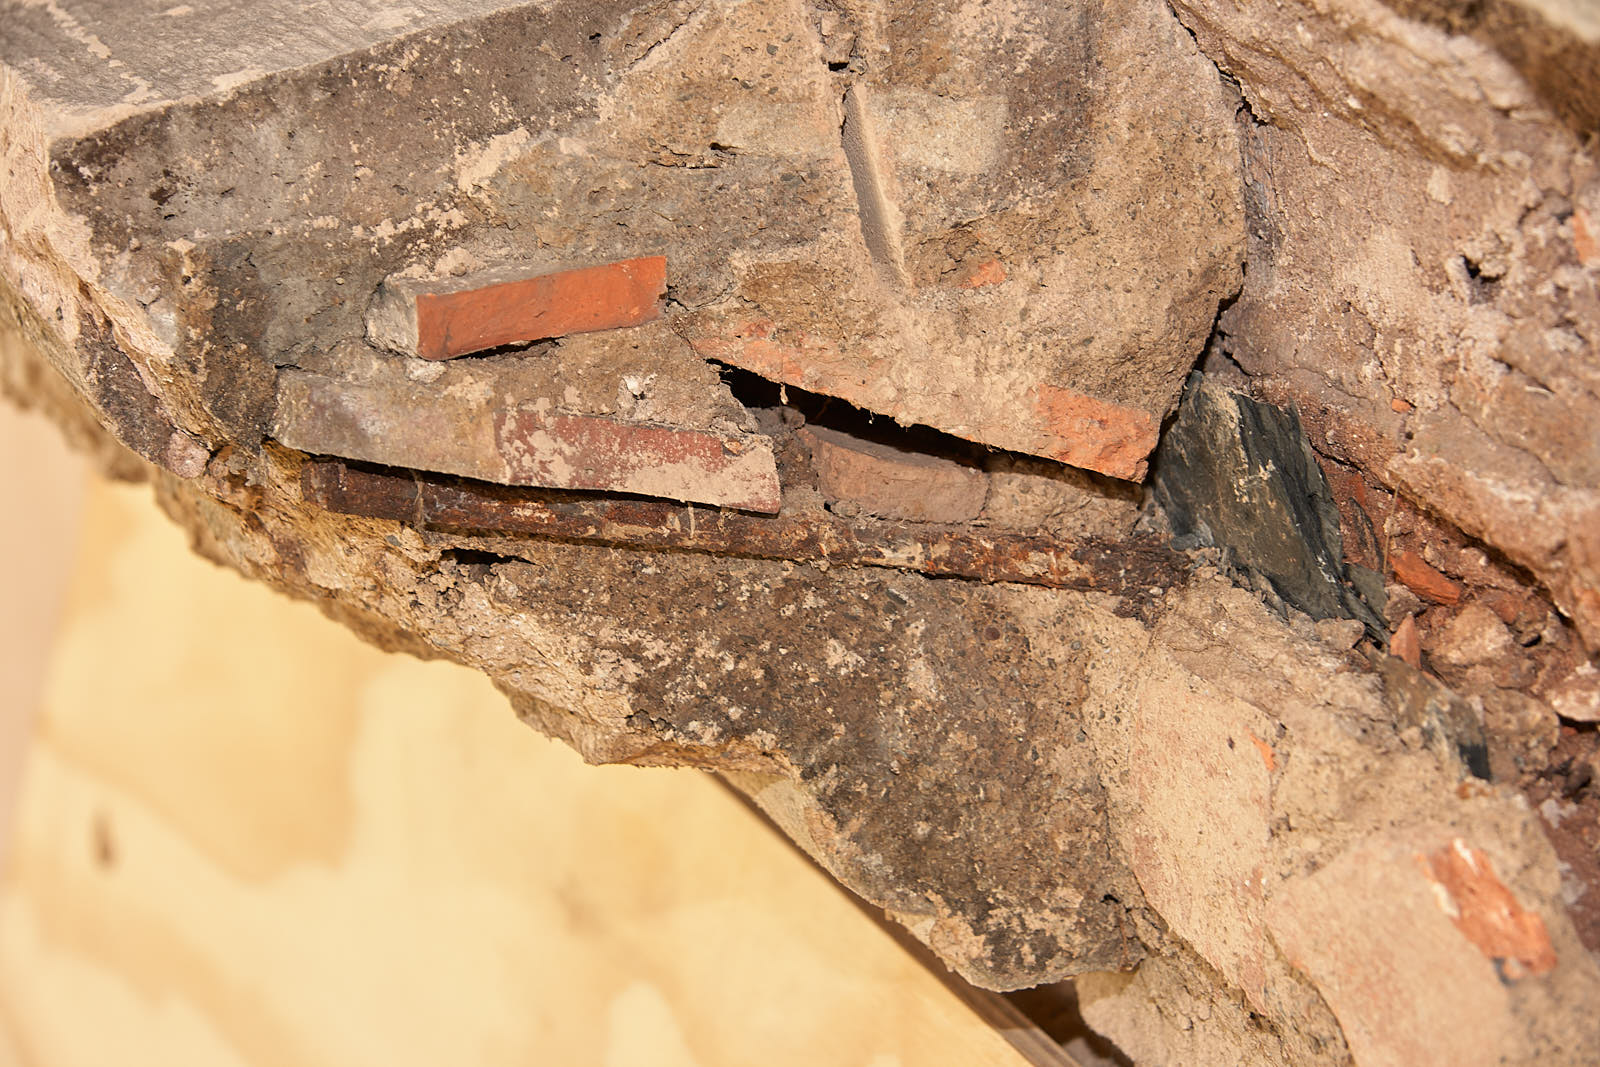
On the two photographs above you can see with the clay tiles used to build out the wall to reduce the amount of plaster required.
The tiles are flush with the large corner stone that has been used along with two very large straps which are attached to the back of the stone and anchored to to building to stop any spread of the arches. You can also see the stresses that this stone had been put under by the two vertical cracks running from top to bottom. The stone was pinned back together using epoxy resin and stainless steel rods. This was undertaken by the main contractor. |
|
| |
|
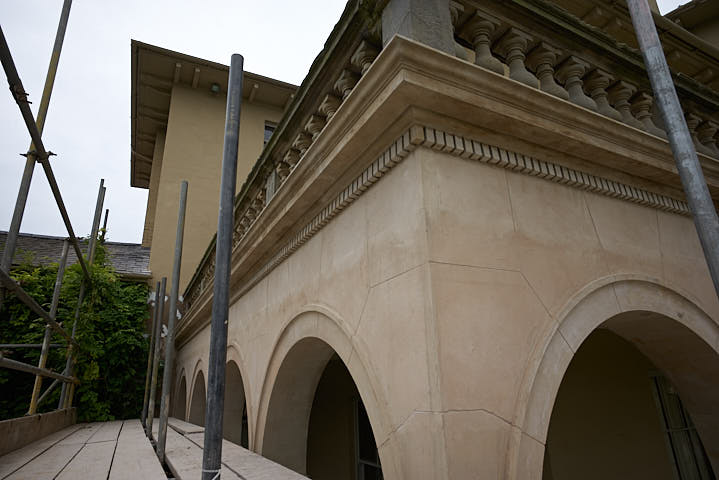
Pictures Right & Below show the new arches after
we had run them in-situ, then marked the ashlar lines.
We made a jig to form the arches as they where all the same.
This made the whole process quicker and easier. The moulding was run on the front face then the soffit was filled in afterwards. |
|
 |
 |
| |
| |
|
| |
When we came to repair the cornice above the arches, we found that the wall plate had rotted out. This changed everything. Patching using joint rules and re-running the cornice in isolated sections was no longer an option. The wall plate had to be replaced and the exsisting roof timbers strapped the to the new wall plate. This process was carried out by the main contractor. To allow this to happen, we had to remove all the cornice and a small section of the new plasterwork just below it. Once the main contractor had repaired the wall plate and section of wall above it, we were able to start the setting out of the new cornice. |
| |
|
|
 |
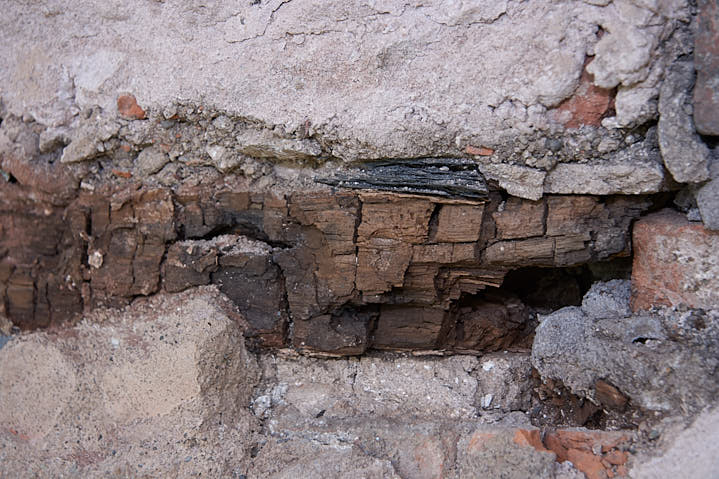 |
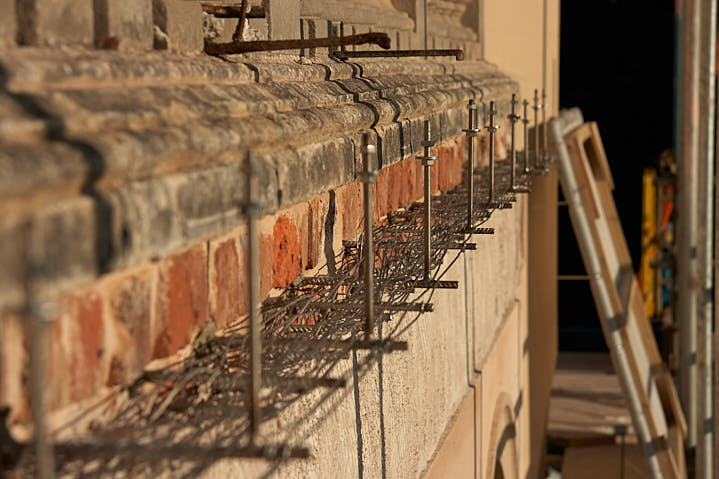
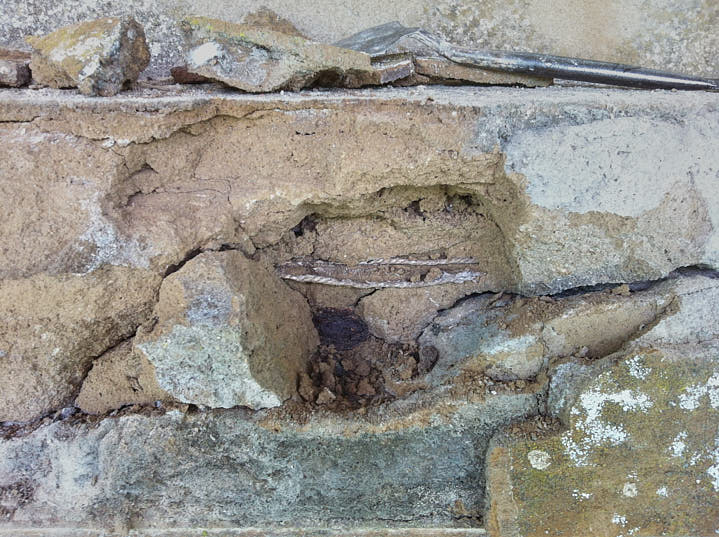
Pictures above and left show the rotted out wall plate.
This seemed to be caused by the slate that the
original plasterers or builders had fixed to it, to give the
plaster something to grip on to. The water that had managed to penetrate the wall plate had not been able to
dry on the cornice side. This caused it to rot from the cornice side outwards. |
|
| |
The picture below left shows one of two methods used to fix the cornice above the arches. The method shown used large iron nails spiked through the slate into the wall plate at an angle. The nails were in a relatively straight line every 100mm or so with a line staggered above them (about 50mm above). The nails then had string woven over them like a cats cradle. This was used to bed tiles onto using there roman cement mixture. Once they had done this and it had set sufficiently they used this to start building up the layers to form the cornice.
The other method was brick corbelling. I have never seen the method for supporting the cornice changed part way through a run before. I could not see any reason why they would have done so and I wonder what sort of conversations went on between the tradesmen and the Architect to make them change methods part way through. |
|
| |
 |
| The picture below was from a cornice at Calke Abbey You can see clearly two lengths of string going over the top of a rusting iron nail. As the nails rust they expand and caused the cornice to crack. On this job we removed as many of the spikes as we could leaving as much of the cornice intact as possible. We replaced the iron spikes with stainless steel ones then re-run and patched up the cornice. |
|
 |
| |
|
Picture left shows the stainless steel reinforcement and lattice work used to form the foundations for the new cornice.
Picture below shows the cornice with the right side of it having had its finishing coat on and the left hand side cord out ready to be finished. |
|
| |
 |
| |
|
|
| |
 |
| |
| |
|
|
| |
| |
| |
| |
|
| |
|